chrisinmtown.github.io
Replacing a VW New Beetle Battery
27 Mar 2010
This note shows how I changed the battery on a 2005 VW New Beetle convertible. I hope it helps someone out there!
I finally acknowledged that I could not put off the car’s odd starting noises any longer and set out to replace its battery. This was a 2005 new beetle convertible with a 2.0L engine. The battery was never changed, and I figured 5 years was a decent lifetime for the basic manufacturer’s battery. The required size is Group 47, whatever that means. My local friendly VW dealer quoted me $230 to replace it, hello! Costco let me down, no Group 47 batteries at all. NAPA offered a battery at $110 with 18/75 warranty, 600 CCA. On most cars a battery change is a matter of unscrewing a single nut & loosening the cables from the posts. How bad could it be, I figured?
Well. VW’s engineers seem to take particular delight in making routine maintenance difficult. The oil plug on this vehicle is just about inaccessible. The tail lights and head lights are just weird to remove when a (non-LED!) bulb burns out. The battery was similarly unpleasant.
The good news is, anyone can do it, with time and patience. You’ll need these tools: 10mm socket, 14mm socket (some people needed a 13mm), socket drivers, about 12 inches of socket extension for the larger socket, a DIN5 hex key, a light, and a towel (really). See the end of this note for some tool-set suggestions.
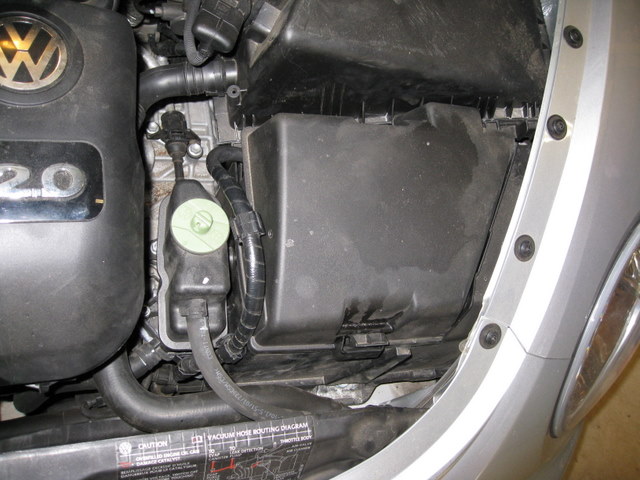
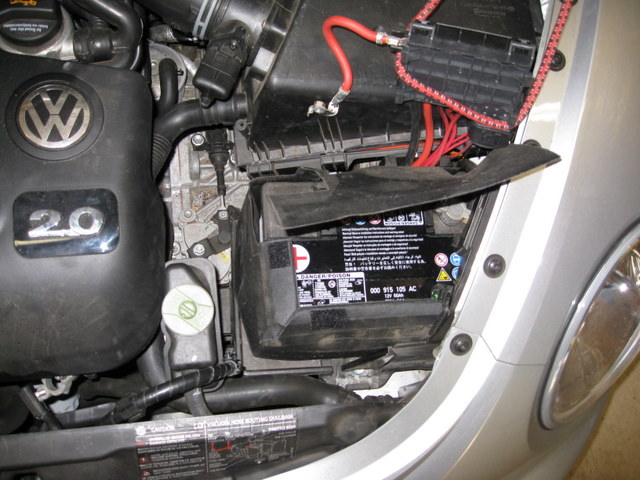
This picture shows the view under the hood. The battery is completely enclosed in plastic.
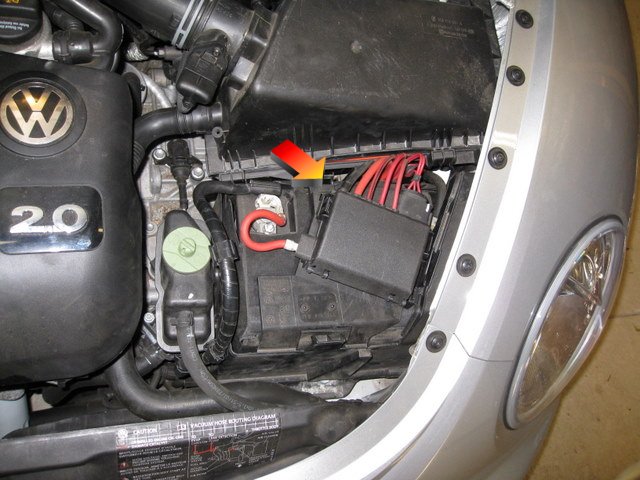
In this picture you see that I’ve removed the plastic cover, which isn’t too bad, it is only clipped in place. A strange junction box lurks beneath it. Oh boy. The arrow points to the small tab that you need to push down, then the junction box slides to the back (towards the passenger compartment) and lifts off.
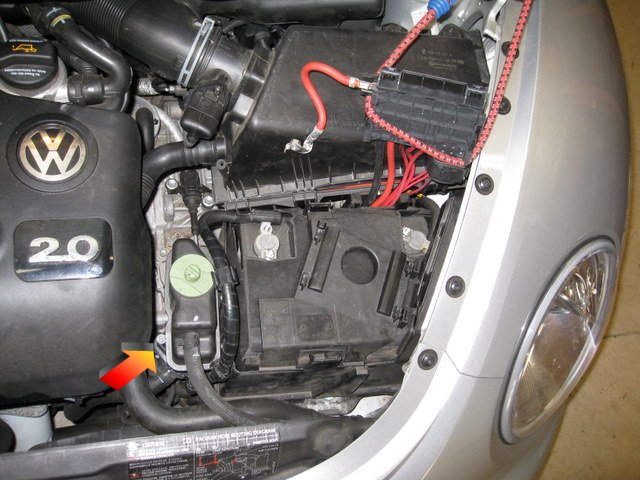
I loosened the nut on the clamp holding the red cable to the positive battery terminal, removed the clamp, lifted the junction box, and tied the junction box out of my way with a bungee. In this next pic the arrow points to the bolt holding down the power steering reservoir. That gets loosened next. It takes a DIN5 hex key and almost zero force. The outside is round so no socket fits it. Gee thanks VW. If you have an 8 inch long hex key you’re a professional and my idol. I used a little hex key. Don’t drop the bolt!! I found an extra one in there that must have survived from the factory, go figure. And don’t lose the washer.
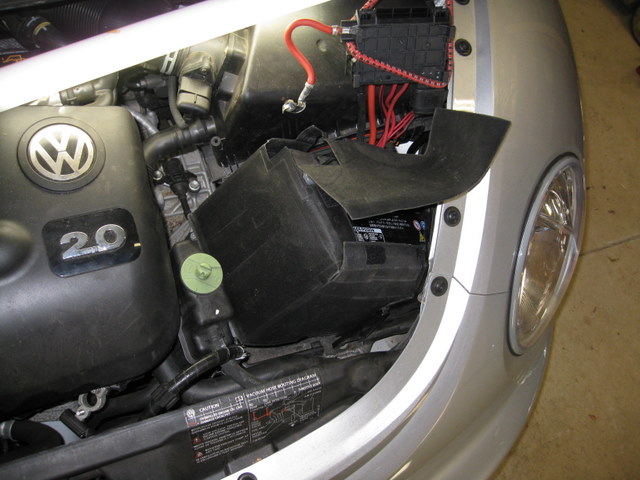
Here the power steering reservoir is loose and dangling. Next the top plastic shell can be lifted out.
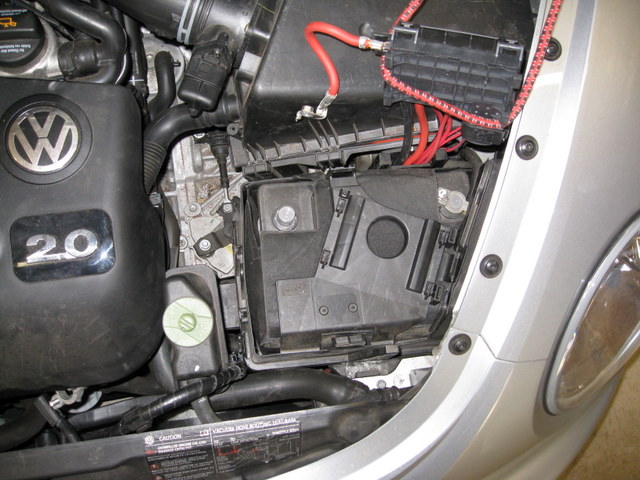
The top shell is off and I’ve opened the velcro. OMG! There’s a battery in here! Next loosen the bolt on the clamp on the negative terminal and pull off the clamp.
This next picture shows the battery free of all cables and shells. The only thing remaining is the bracket that holds the battery down at the front. I used a 14mm socket on the bolt; one reader with the same car reports his had a 13mm bolt. I really needed a 12-inch extension but I made do with the basic long one plus the short one from my set. The bolt took almost zero torque to loosen. I managed to lift the bolt and bracket out without dropping them, which was a miracle.
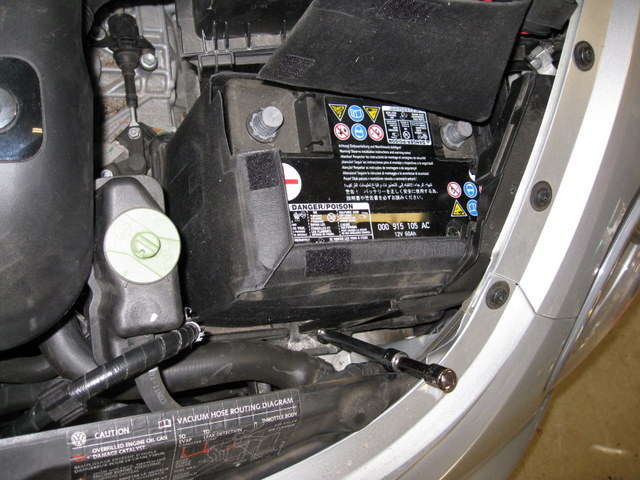
In this picture you can see that the battery can be tilted and removed. It’s heavy and just barely clears the obstacles. This reminds me of those old problems in calc when I had to figure the longest ladder that would fit around a corner. My trouble light looks like a lightsaber in the picture :-)
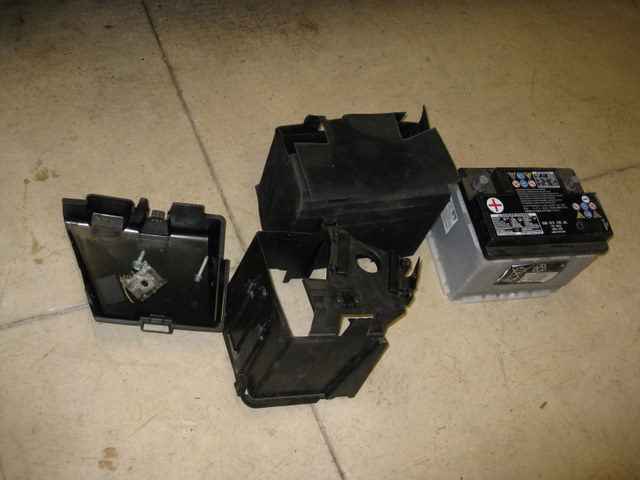
Here are all the parts I removed. Can you believe all this extra stuff!? I’m not sure why they supply a jacket but there it is. The top cap has the hardware - the long thin bolt from the power steering reservoir, along with the big bolt plus bracket from the front of the battery.
Finally here’s a picture of the empty battery platform. It’s quite large, I think there is room for a much larger battery, maybe for very cold climates?? Note the towel I stuffed underneath the platform (see below), which should help when you reassemble in reverse order!
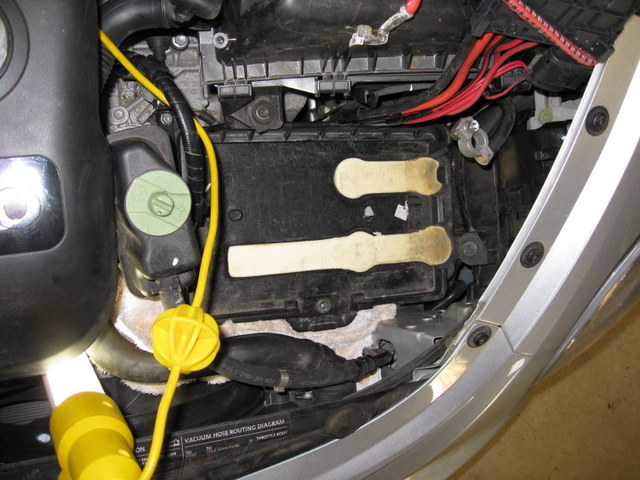
At this point I can confess to the near disaster I had without fear of many people seeing it :-). I put the velcroed jacket on the new battery, then lowered the new battery in. Next I tried to put on the bracket .. and promptly dropped it. It simply vanished into the depths. I mean it was gone. No sign of it. I jammed that yellow trouble light into every possible crevice. After much panicing, cussing, visions of flatbed trailers, my wife killing me, and so on I finally moved the radiator hose enough that I could see the bracket, way down deep. I managed to dislodge it and it went deeper. It hit the bottom of the engine shield (did I mention that VW engineers make everything difficult?). Thru some dumb luck I managed to get my hand in from the side and reach thru far enough to retrieve it, and didn’t draw blood on the nice sharp edges. Then I resorted to the towel - stuffed it below the blatform to hide all crevices, then the next time I dropped it the little bugger could not escape. So that’s the happy ending to this story.
Reader Feedback
Thanks to the people who wrote me about changing their batteries!
December 2010
Ryan H. sent me these suggestions for the appropriate tools, the links go to Amazon:
-
A screwdriver set that includes hex blades: Wiha 28199 Drive-Loc VI Interchangeable Blade Set
-
A very nice metric socket set, but a little spendy: Wera Zyklop 8100 SB 1 3/8-Inch Metric Ratchet Set
February 2013
Stephen S. wrote me with this improvement to my directions:
Your blog post for the battery change was great. I had no idea where to start. One addition. You do not have to remove the bolt and battery bracket completely. If you wind the bolt out about 3/4 of the way you can get the battery in and out without having to lose the bolt.
Blog index / feedback to christopher döt lott át gmail dðt com